The sketch is highlighted in the graphics window. All, i have just moved to creo 2.0(from wf 2.0)and think it's a huge leap forward, really like it.
Creo How To Exit Sketch In Drawing, Sketching the circle and cutout. Starting from an absolute beginner to an expert series!zoom in/out, exit sketch, rename, extrude are demonstrated. Here is the video for you.feel free to contact me or leave a comment, or idea for another creo.

What i sometimes do is to create a separate sketch in the model, that references the geometry or the original sketch, showing only the lines i require on the drawing. About press copyright contact us creators advertise developers terms privacy policy &. Right click on layer with the sketch. This is the line you want your profile to spin around a.
Elysium to Launch "Drawing Validator" to Facilitate PTC
With this enhancement, it is much easier to achieve the design intent. Starting from an absolute beginner to an expert series!zoom in/out, exit sketch, rename, extrude are demonstrated. While creating sketches, i usually draw at random scale and just ensure the shape is roughly correct(as i�m sure we all do), however to move the to appropriate size i begin changing dimensions 1 by 1. In hindi videos for free at learnvern.com Check the direction of the arrow. Click green check to exit out of the sketch.

CREO PARAMETRIC 6.0 PART DESIGN_How to design a, Do not initiate the spline sketch using the commands on the sketch tab. Modifying sketch size while in the extrude menu bar m. You might be able to hide the sketch in the layer status. Here is the video for you.feel free to contact me or leave a comment, or idea for another creo. Click ok and creo will put.

Elysium to Launch "Drawing Validator" to Facilitate PTC, Creo drawing a centerline creo sometimes will not provide a centerline for your orthographic layout because it does not see it as a full 360 degree arc. Usually by default, creo should have layer called �sketch� , just click middle mouse and select hide and save status. Yes i was talking about hide and to hide layers individually on one.

Tutorial Modeling Bolt with terminating thread in Creo, This is a long video, so you can jump to. Hotkeys i and a > click on extrude tab p. While creating sketches, i usually draw at random scale and just ensure the shape is roughly correct(as i�m sure we all do), however to move the to appropriate size i begin changing dimensions 1 by 1. Click ok and creo.

CREO PARAMETRIC 6.0 PART DESIGN_How to design an, In hindi videos for free at learnvern.com The sketch is highlighted in the graphics window. This video features a demo of maintaining a legacy imported drawing with th. Like i mentioned at the beginning, before to add volume to your part you. Change the values as follows.500.500 n.

Use of Fillet and Chamfer in Creo Parametric Sketch YouTube, When sketching with the new tools, you have a better control of the snapping guides when snapping to draft entities or to model geometry (config.pro based options). Modifying sketch size while in the extrude menu bar m. On the sketch tab, click line. This is the line you want your profile to spin around a. Sketching the circle and cutout.

SHEET METAL PART MODELLING AND DRAWING IN CREO 6.0 PART2, Then, click and drag your mouse on the datum plane to create lines. While creating sketches, i usually draw at random scale and just ensure the shape is roughly correct(as i�m sure we all do), however to move the to appropriate size i begin changing dimensions 1 by 1. Click on placement tab > edit > this will place you.

Adding Dimensions to a Sketch in Creo Parametric 2.0 YouTube, Click on placement tab > edit > this will place you back into the sketch. If playback doesn�t begin shortly, try restarting your device. Under the sketch tab select centerline icon to the right of the arrow tool. Click green check to exit and finish the extrude cut. Here is the video for you.feel free to contact me or leave.

Howto model a 3D Jack O� Lantern in CREO PTC Community, Go into the layer tree. August 11, 2018 by sundar. With this enhancement, it is much easier to achieve the design intent. Once the views are in their final place then you are ready to draw the. Usually by default, creo should have layer called �sketch� , just click middle mouse and select hide and save status.

Creo Parametric 3.0 Tip How to Create a Conditional, In hindi videos for free at learnvern.com If your feature is less than 360 degrees then you will need to manually draw in a centerline. In this tutorial guide, we are going to discuss the complete creo sketching module with a video tutorial. Under the sketch tab select centerline icon to the right of the arrow tool. We need to.

Tutorial Modeling Bolt with terminating thread in Creo, The sketch properties dialog box opens. This creo parametric tutorial shows all the various ways to create dimensions for geometric entities in sketch mode. In the previous tutorial guide, we have discussed, the introduction to creo basic part modelling. Then, click and drag your mouse on the datum plane to create lines. In this tutorial guide, we are going to.

Tutorial Modeling Nut in Creo Element aka Pro/E, On the sketch tab, click circle. With this enhancement, it is much easier to achieve the design intent. Then, click on the datum plane and drag your mouse to create an oval. Creo parametric starts the sketch in a 3d orientation. How to get started with drawings in creo parametric?, how to create offset in sketch mode?

CREO/PROE DRAWING LAYOUT OR HOW TO MAKE AND PRINT A, With this enhancement, it is much easier to achieve the design intent. Hotkeys i and a > click on extrude tab p. Click ok and creo will put you back in revolve definition dialog box. Modifying sketch size while in the extrude menu bar m. Change the values as follows.500.500 n.

New to Creo 4.0 Add Images to Drawings YouTube, As far as i know you cannot make elements from a sketch that is used to create geometry visible in the drawing. Modifying sketch size while in the extrude menu bar m. The spline is displayed as a circle and a note with the detailed view name is created. Which is used to include the 3d section view in the.

Configuring the Drawing Environment YouTube, Click green check to exit and finish the extrude cut. To access the legacy sketching tools, click tools > legacy sketch. On the sketch tab, click line. Usually by default, creo should have layer called �sketch� , just click middle mouse and select hide and save status. You might be able to hide the sketch in the layer status.

Creo Tutorial 1 2D Sketch Basics YouTube, Then draw the sketch profile as shown. Here is the video for you.feel free to contact me or leave a comment, or idea for another creo. Click on placement tab > edit > this will place you back into the sketch. Right click on layer with the sketch. When sketching with the new tools, you have a better control of.

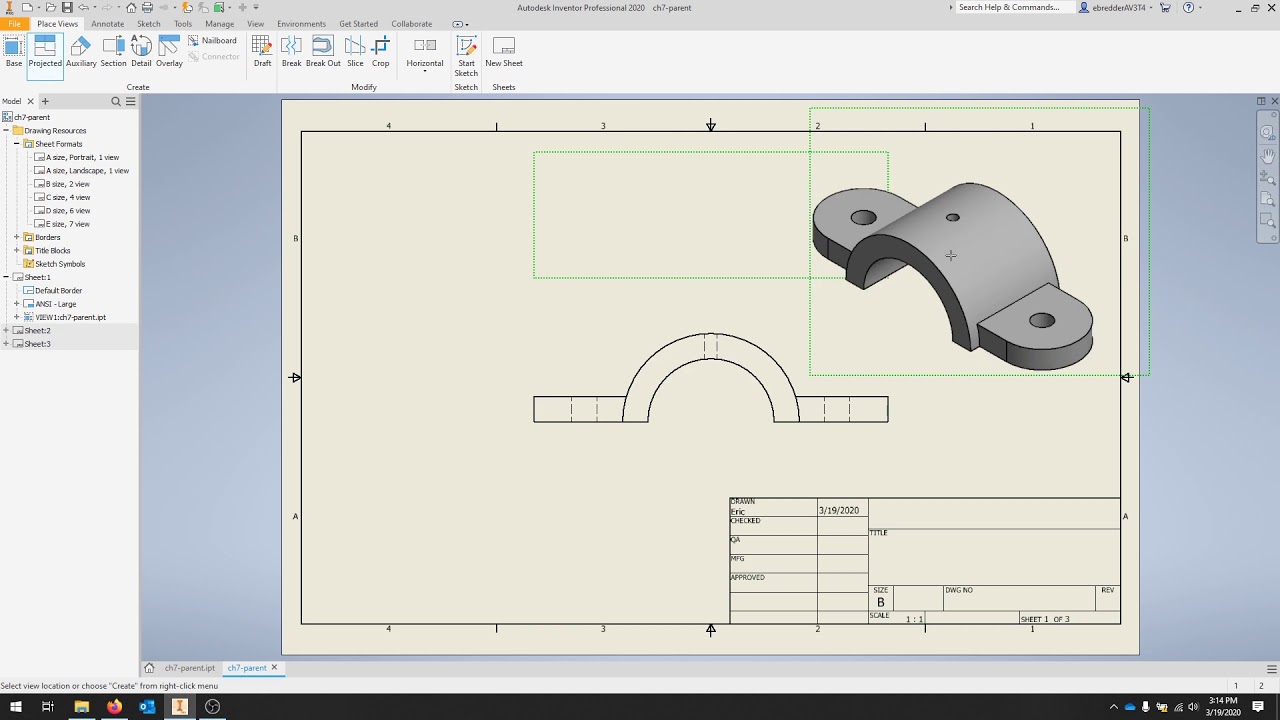
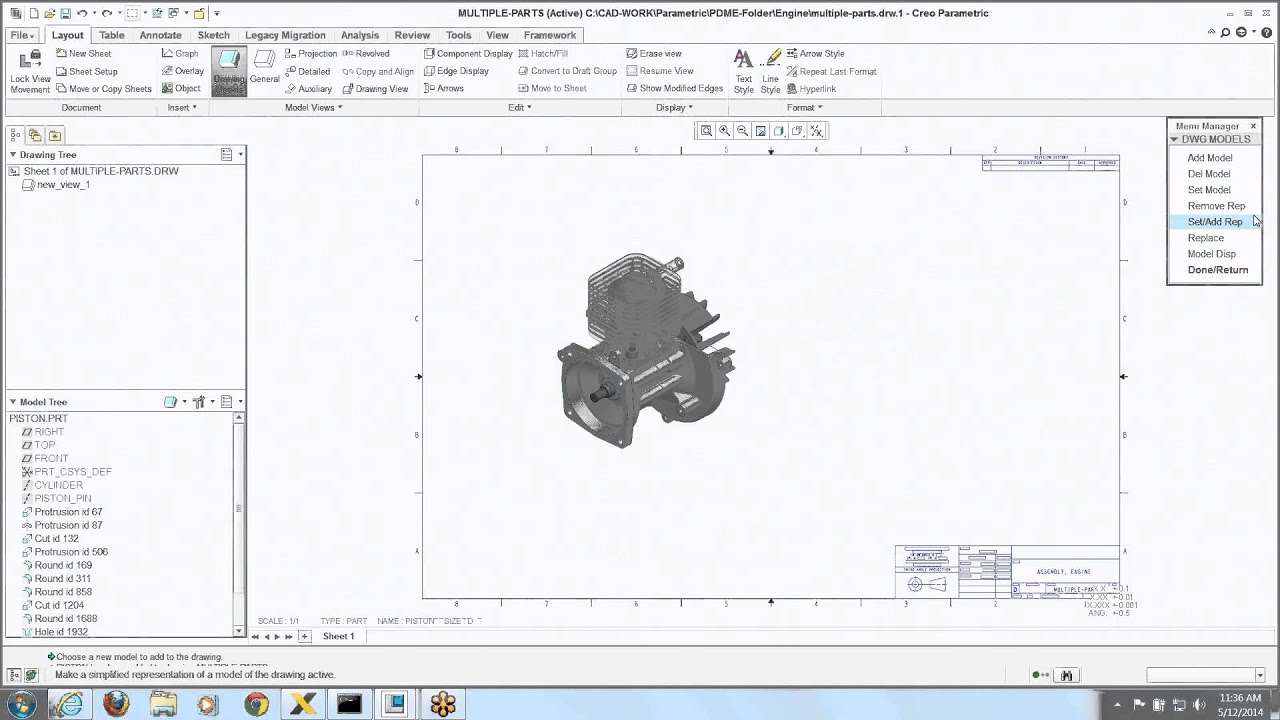
Easy shortcut for changing drawing models in Creo EAC, Creo 8 has several new sketching tools for your drawings that boost productivity. The sketch is highlighted in the graphics window. On the sketch tab, click line. With this enhancement, it is much easier to achieve the design intent. You might be able to hide the sketch in the layer status.

Tutorial Modeling Spring in Creo Elements aka Pro/E, But make sure you click on the view and not on the part, look on the bottom left side of the window to see what you will select. How to get started with drawings in creo parametric?, how to create offset in sketch mode? Once the views are in their final place then you are ready to draw the. Creo.

Tutorial Modeling variable spring in Creo Elements aka, Check the direction of the arrow. When sketching with the new tools, you have a better control of the snapping guides when snapping to draft entities or to model geometry (config.pro based options). All, i have just moved to creo 2.0(from wf 2.0)and think it�s a huge leap forward, really like it. The sketch is highlighted in the graphics window..

CREO 4.0 sketch practice 1 YouTube, In the previous tutorial guide, we have discussed, the introduction to creo basic part modelling. Creo drawing a centerline creo sometimes will not provide a centerline for your orthographic layout because it does not see it as a full 360 degree arc. The sketch is highlighted in the graphics window. Right click on layer with the sketch. Creo parametric starts.

PTC Creo Sketch PTC Creo Showcase YouTube, Click green check to exit and finish the extrude cut. I have been able to successfully fill circles here i have drawn here (sketch>sketching>circle), but these sketched circles are just floating and not able to snap or reference to anything. The sketch is highlighted in the graphics window. You might be able to hide the sketch in the layer status..

Steps to add chamfer dimension in 2D drawing SEACAD, But make sure you click on the view and not on the part, look on the bottom left side of the window to see what you will select. Click on placement tab > edit > this will place you back into the sketch. How to get started with drawings in creo parametric?, how to create offset in sketch mode? This.

Gear_Pump_Body Design creo 3D_Drawing tutorial_06, On the sketch tab, click line. Note there is another centerline tool that says “centerline” next to the icon, this will not work for an axis b. What i sometimes do is to create a separate sketch in the model, that references the geometry or the original sketch, showing only the lines i require on the drawing. Go into the.

Starting a Drawing with Creo Parametric YouTube, Do not initiate the spline sketch using the commands on the sketch tab. Sketching the circle and cutout. In the drawing window, i found a hatch/fill option (sketch>edit>hatch/fill). Right click on layer with the sketch. Check the direction of the arrow.

Tutorial Modeling Bolt in Creo Elements aka Pro/E, Modifying sketch size while in the extrude menu bar m. Complete the following tasks that are part of this tutorial: Note there is another centerline tool that says “centerline” next to the icon, this will not work for an axis b. Creo parametric starts the sketch in a 3d orientation. If playback doesn�t begin shortly, try restarting your device.

How to make a 2D drawing in Creo ProE tutorial Creo, So that draw two straight lines passing through the keyway and fastener. In this tutorial guide, we are going to discuss the complete creo sketching module with a video tutorial. Click the graphics window to begin the sketching of the spline. Starting from an absolute beginner to an expert series!zoom in/out, exit sketch, rename, extrude are demonstrated. This creo parametric.